General Instructions
In this homework is to continue working with HTML, CSS, and JavaScript. In particular we will work with the DOM to create elements, respond to button clicks, use CSS to style pages and sections of pages, and to produce an information “dialog”.
Create and Use a new Branch hw4
We will create a new git branch called hw4 (starting from your ‘hw3’ branch) for use in this assignment. The branch you create must exactly match the one I’ve given you for you to receive any credit for this homework.
Prior to creating this new branch make sure your working directory is “clean”, i.e., consistent with the last commit you did when you turned in homework 3. Follow the procedures in GitHub for Classroom Use to create the new branch, i.e., git checkout -b hw4. Review the section on submission for using push with a new branch.
Use README.md for Answers
You will modify the README.md file to contain the answers to this homework.
# Homework #4 Solution
**Your name**
**NetID: yourNetID**
Questions
Question 1. (10 pts) Club Events from JavaScript Data
1(a) Create Event/Activity Data
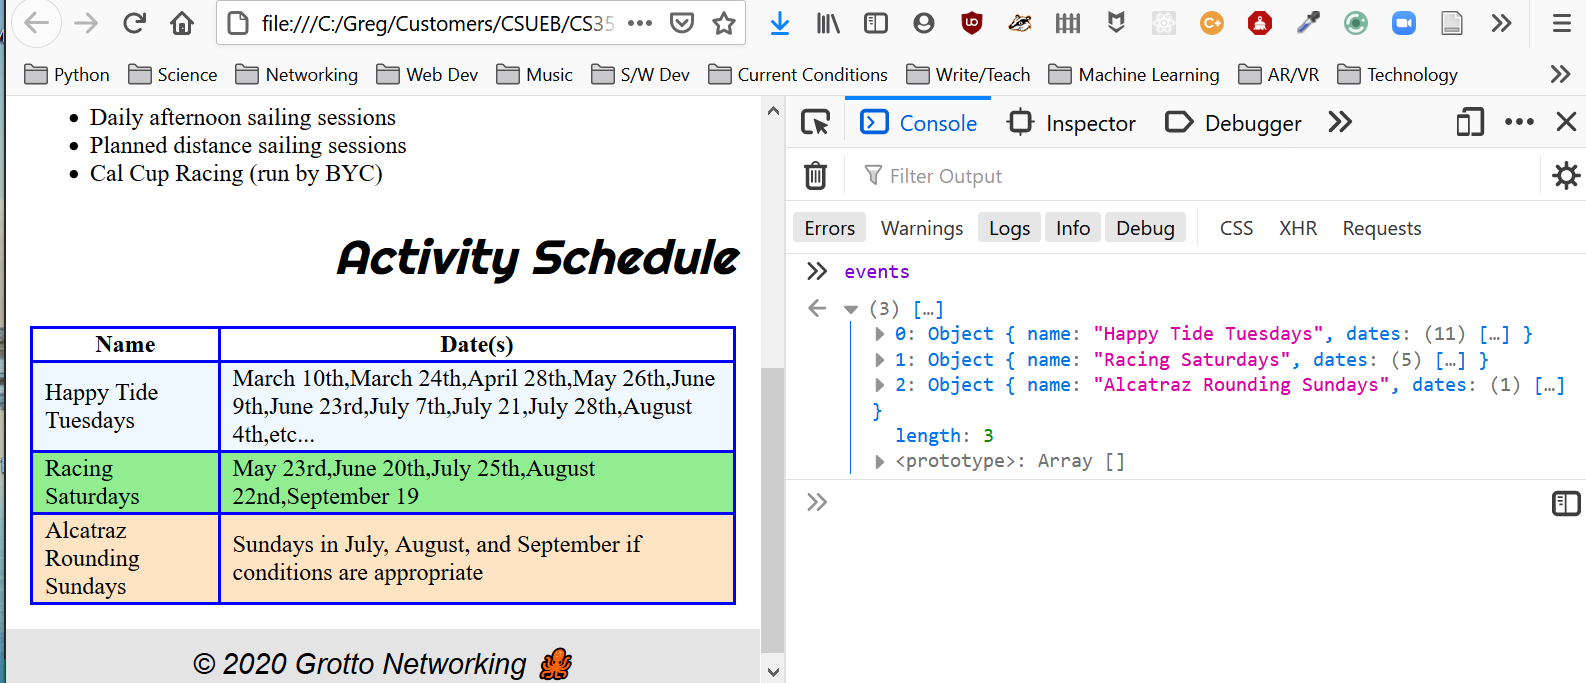
Generate a list of at least three events (scheduled activities) for your club. Each event will be a JavaScript object with at least name and date properties (you can add more as appropriate for your club), store these events as an array of JS objects in the file eventData.js. Show a portion of your data here. Mine looks like:
// Foiling club year 2020 events
events = [{"name": "Happy Tide Tuesdays",
           "dates": ["March 10th", "March 24th", "April 28th", "May 26th",
                     "June 9th", "June 23rd", "July 7th", "July 21",
                     "July 28th", "August 4th", "etc..."]},
         {"name": "Racing Saturdays",
          "dates": ["May 23rd", "June 20th", "July 25th",
                    "August 22nd", "September 19"]},
         {"name": "Alcatraz Rounding Sundays", "dates": ["Sundays in July, August, and September if conditions are appropriate"]}];
Yours must be different from mine! You can organize the data into objects as you like!
1(b) Update/Prepare Page for DOM manipulation
Update your club activity page, by removing any hardcoded club events/activities from the HTML table from the previous assignment. Import your data file using a script tag in the <head> section. Hint: adding an id to the appropriate element can make the next step easier.
1(c) Generate Elements from Data
Using an internal JavaScript script located right before the closing body tag, use the DOM interface to add rows and data elements to the table corresponding to the data in eventData.js. You cannot use any for, while, or do loops! Only use the basic DOM interfaces covered in the course slides!
Show your code (only, not HTML) here and a screenshot. Mine looks like:
Question 2. (10 pts) Club Application Page Part 1
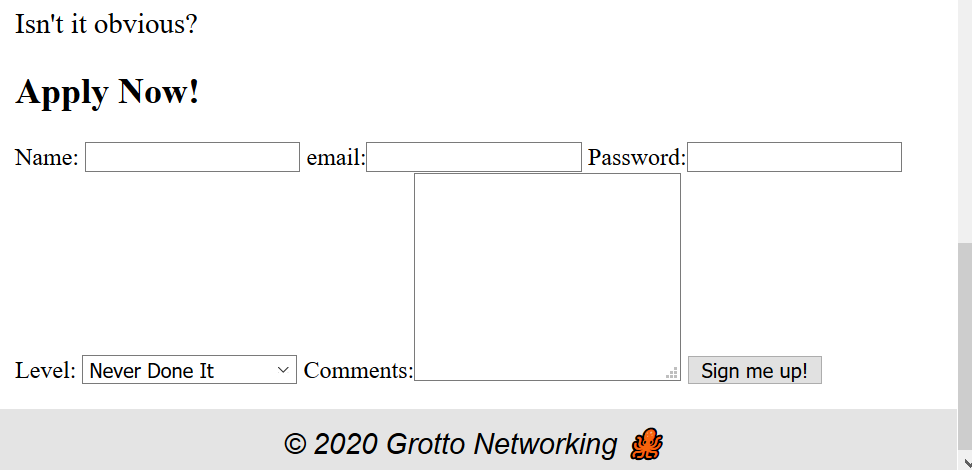
2(a) Create a Club Application Page
We need a page for new members to apply to your club. Create an application page that contains at least the following inputs: name, email, password, <select> control. You can use the <select> control to get the user to respond with a specific choice. Typical users are “where did you hear about us”, or in my club I ask them about their skill level. No styling is required here (we will wait until we learn about CSS grid layout!).
Show a screenshot of this page here. Mine looks quite ugly:
Question 3. (10 pts) Login form & DOM events
Note: The functionality described here must work on your deployed site to receive full credit.
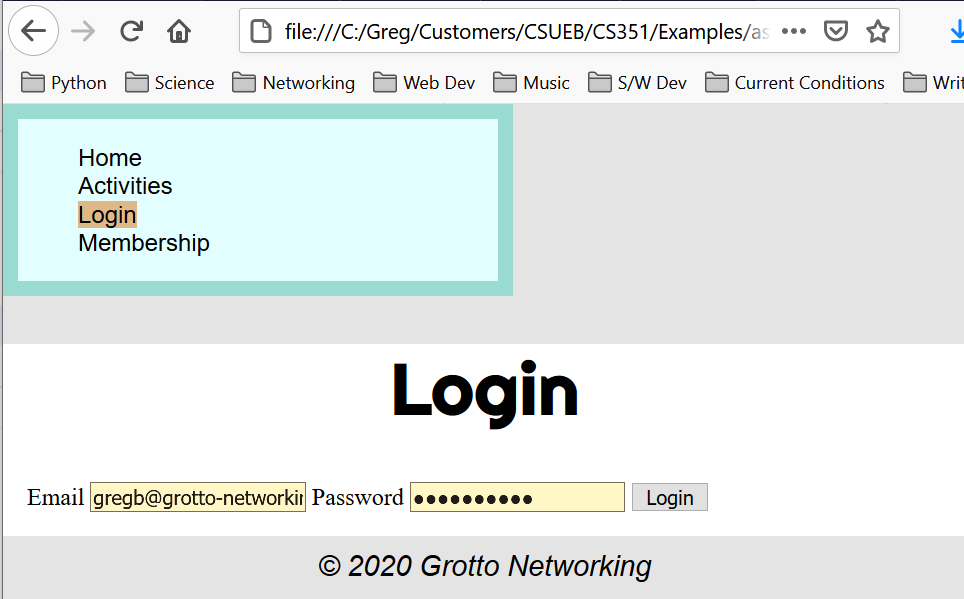
3(a) Enhance club Login Page
When a user attempts to login with your login page we will give them a friendly welcome and tell them the site is under construction. You will need information from the email input element and respond to button clicks. Add any ids that you need to these elements in this step and show the modified portion of the HTML here.
My page looks like this prior to them clicking the “login” button:
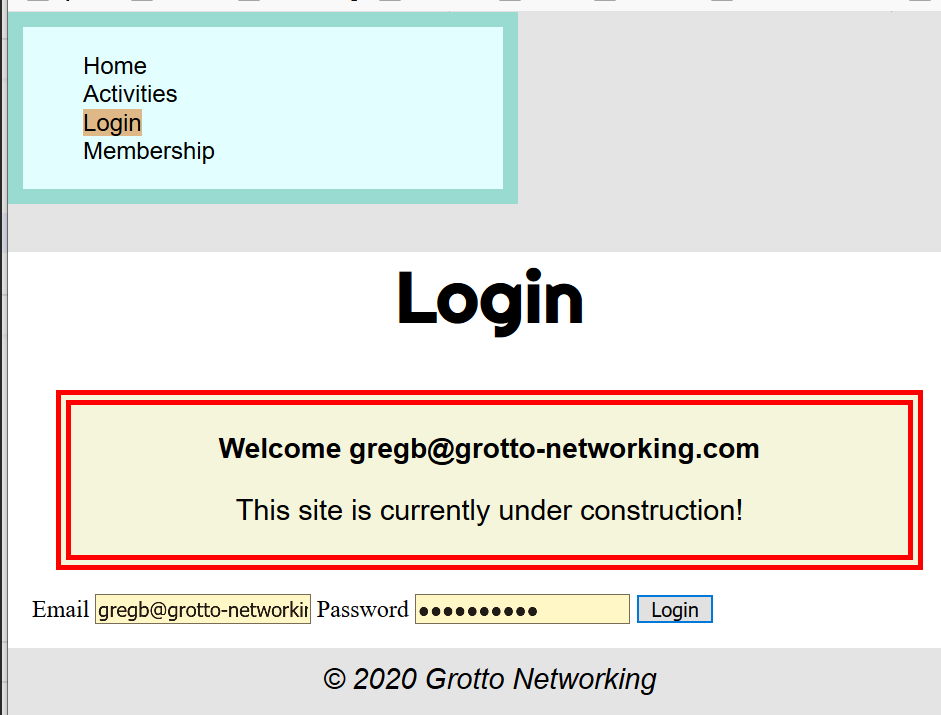
3(b) Button click handler
With an embedded script at the bottom of the <body> when the user clicks the login button create welcome message on the page informing the user the site is under construction, you must use their email in the welcome message. Use at least border and background styling on this element. Note: in my event listener I needed to start with event.preventDefault(); otherwise the page will reset itself and not show your work (this is part of <form> element behavior).
Show your code here and take a screenshot. You must use the addEventListner approach from class to receive credit, you should be using document.createElement() the appendChild(), classList, and various “query” interfaces.
Mine looks like:
Question 4. (15 pts) Club Application Form, DOM events
Note: The functionality described here must work on your deployed site to receive full credit.
4(a) Club Application Validation
For each input on your club application page we want to have some basic validation checks or constraints. You can see a list of all <input> attributes at MDN: Input. For each of your inputs use the: maxlength, minlength, required attributes for basic validation in combination with the pseudo-classes :valid and :invalid to show the user feedback on their inputs.
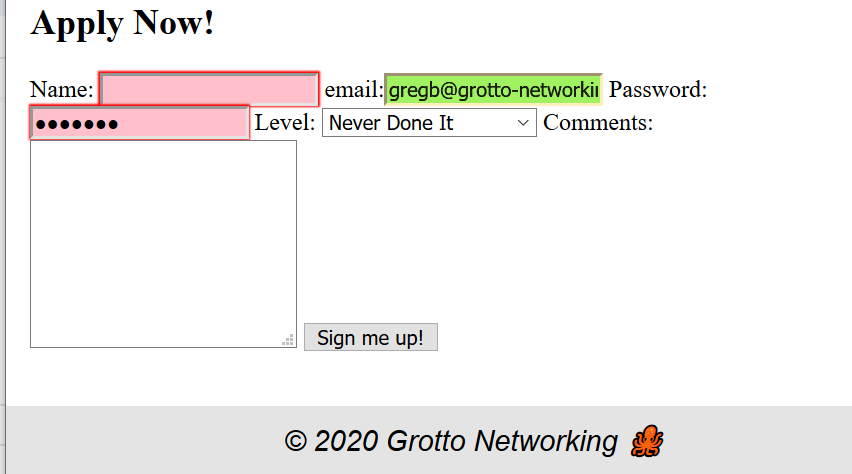
Here is a screenshot of my application page with good email, bad password, and missing name.
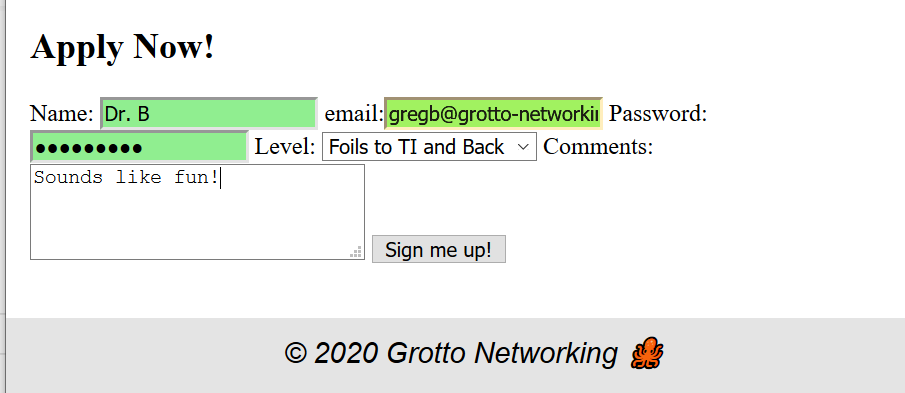
Here is a screenshot of the application page with all valid inputs.
Show the portion of the HTML for this page that includes the inputs here.
4(b) Thank you “dialog”
Create a <section id="ThanksDialog"> to contain a heading thanking them for applying to your club and containing summary information. When they click the apply button you will grab information from the application and summarize it in a <p> element in this section. You will do this using JavaScript. Add at least a border for some styling and add a close button. Note: do not use the HTML5 <dialog> element for this as it is not that well supported yet. We are creating our own with JS and CSS.
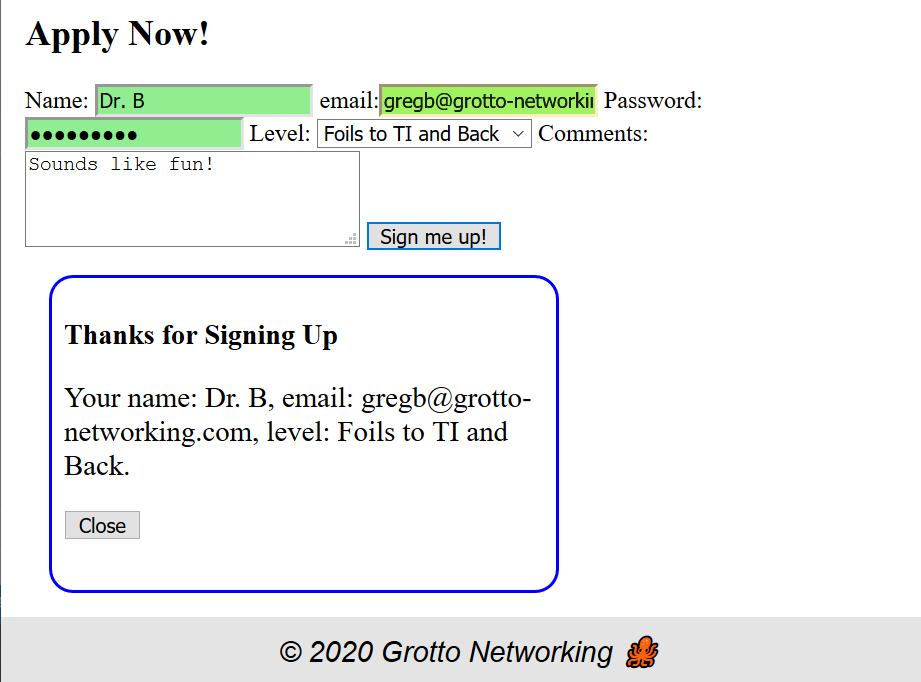
4(c) Show and Hide the “dialog”
It doesn’t make sense to show the “dialog” until after the user has applied. To fix this move the dialog off to the left via a negative left margin and to keep it from taking vertical space set its height to zero.
Now create a class show that you will toggle via JavaScript that sets the left margin to a reasonable non-negative value and the height to something reasonable. element in response to the button click. Toggle this class “on” when the user clicks the apply button and off when the user hits the close button. Optional Use CSS transitions to make this change “smoother”.
Show the CSS for the dialog and show class here.
Show the final JavaScript for this functionality here.
Question 5. (5 pts) Deployment
Deploy your updated web site to a server and give the URL here. Make sure to test your site!