General Instructions
In this homework We are going to enhance our React App with interactivity. You will be updating and enhancing your code in the clubReact directory.
Create and Use a new Branch hw12
We will create a new git branch called hw12 (starting from your ‘hw11’ branch) for use in this assignment. The branch you create must exactly match the one I’ve given you for you to receive any credit for this homework.
Prior to creating this new branch make sure your working directory is “clean”, i.e., consistent with the last commit you did when you turned in homework 11. Follow the procedures in GitHub for Classroom Use to create the new branch, i.e., git checkout -b hw12. Review the section on submission for using push with a new branch.
Use README.md for Answers
You will modify the README.md file to contain the answers to this homework.
# Homework #12 Solution

**Your name**
**NetID: yourNetID**
Questions
Question 1 (10 pts) Application State
(a) App Component
Within you index.js create an App class based component somewhat like the following:
import React from "react";
import ReactDOM from "react-dom";
// lots of component imports

class App extends React.Component {
    constructor(props) {
        super(props);
        // Application state variables:
        // *role* is for RBAC == "role based access control"
        // we have "guest", "user", and "admin"
        //
        this.state = { role: "user", show: "home" };
    }


    render() {
        let content = <Home />;
        // statements/logic to set the content variable based on state
        return (
            <>
                <Menu/>
                {content}
            </>
        );
    }
}
// Now rendering the App component!
ReactDOM.render(<App />, document.getElementById("root"));
(b) Conditional Content Rendering
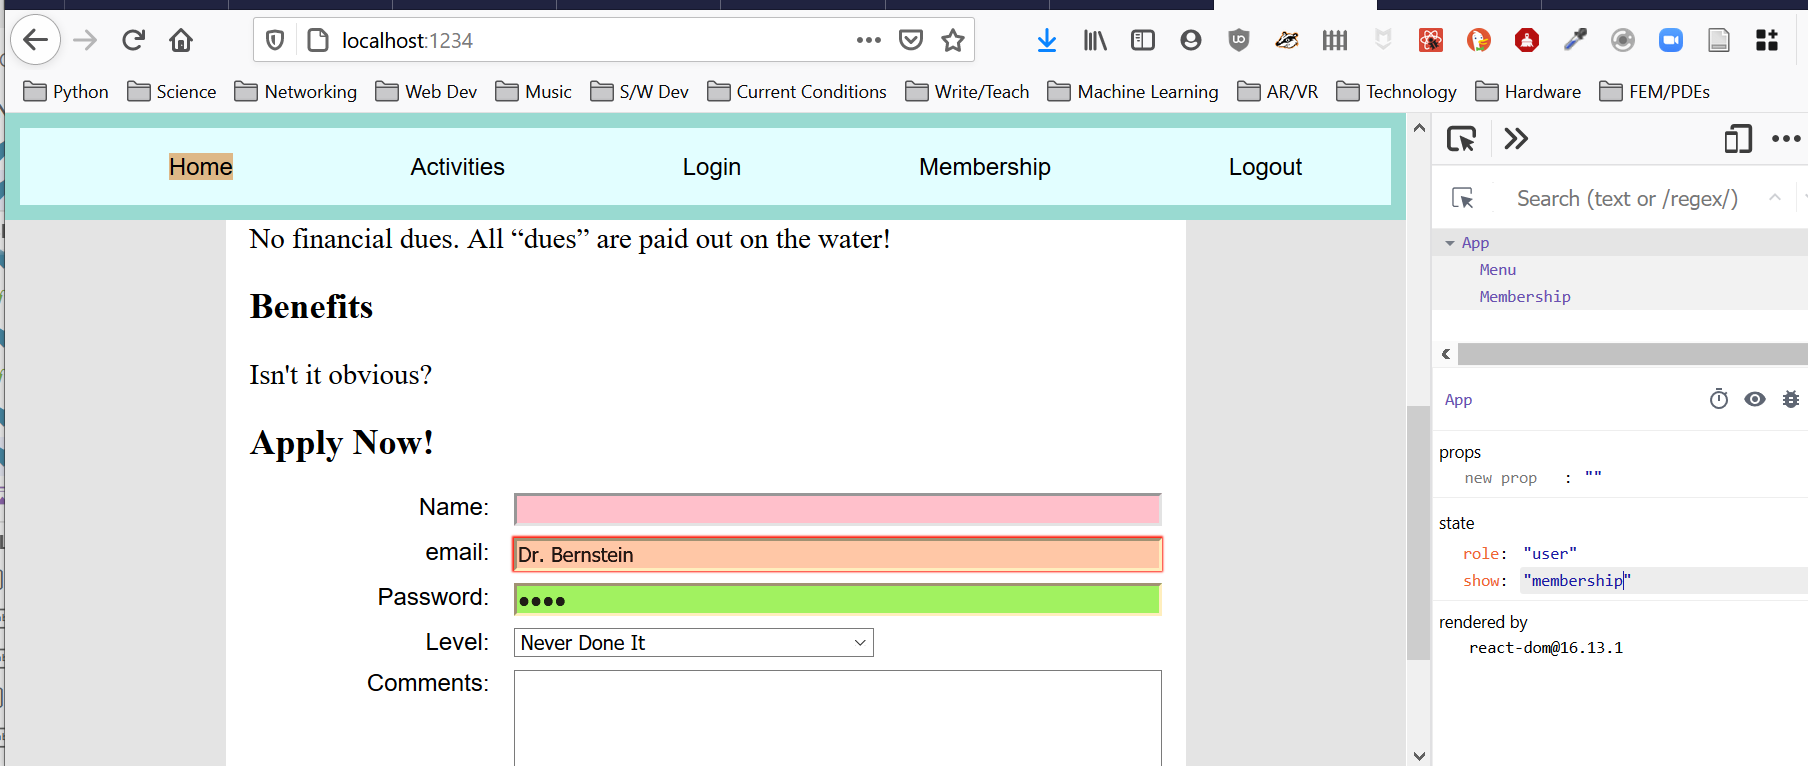
In your update the App component to show the appropriate component based on the state variable show. Note: you can use other names for the state variables role and show. Debug your application to make sure you can see all your different components just by changing the state variable show in the React developer tools in your browser.
Show a screenshot demonstrating this capability. Note: we will change the state from our menu component in the problem 3. Show your App’s render function (not the whole App file).
My screenshot looks like:
Question 2 (10 pts) Dynamic Menu based on State
(b) Dynamic Menu
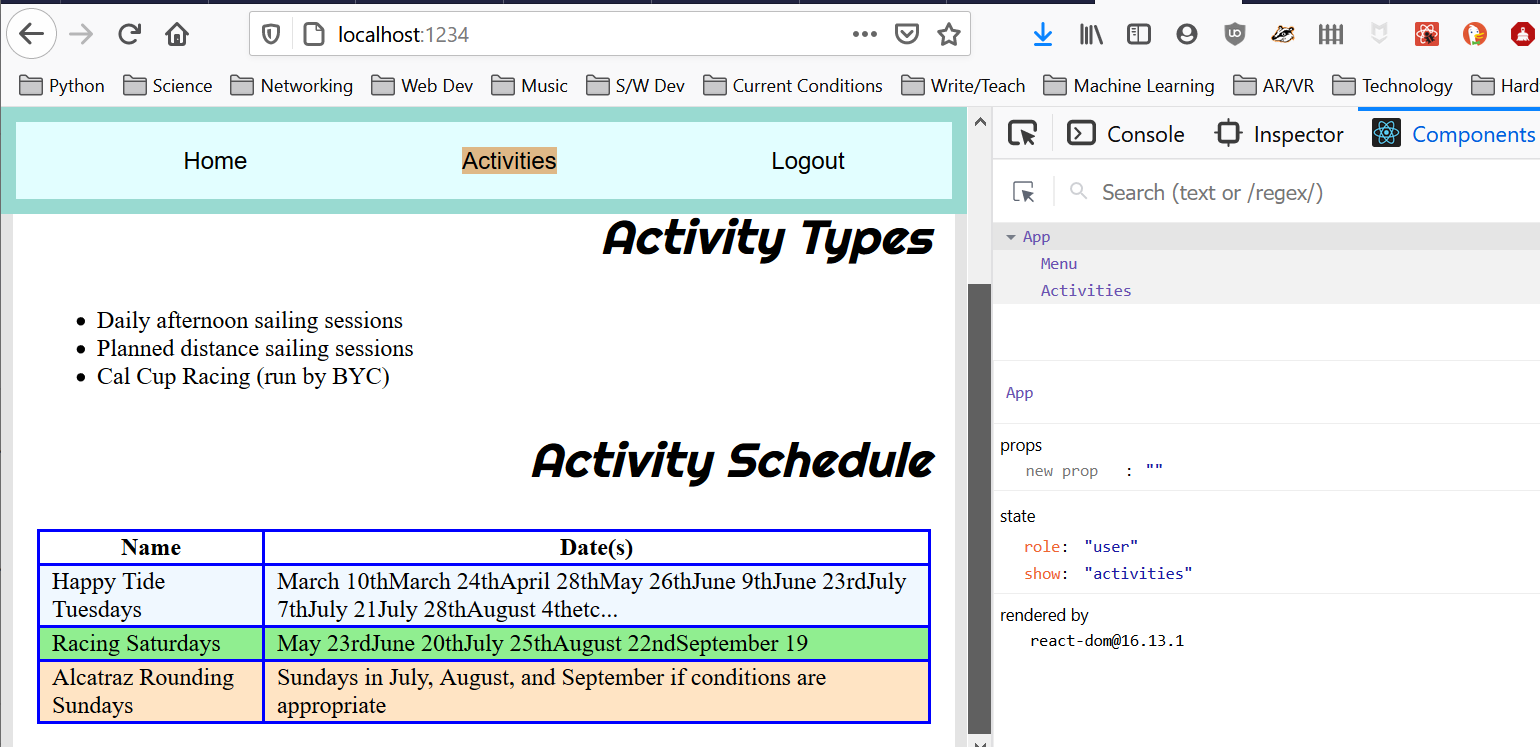
Now pass the App state role into your menu component and have your menu component only show the appropriate items based on the role.
Show a screenshot with role = “user”.
Show a screenshot with role = “guest”.
My screenshots look like:
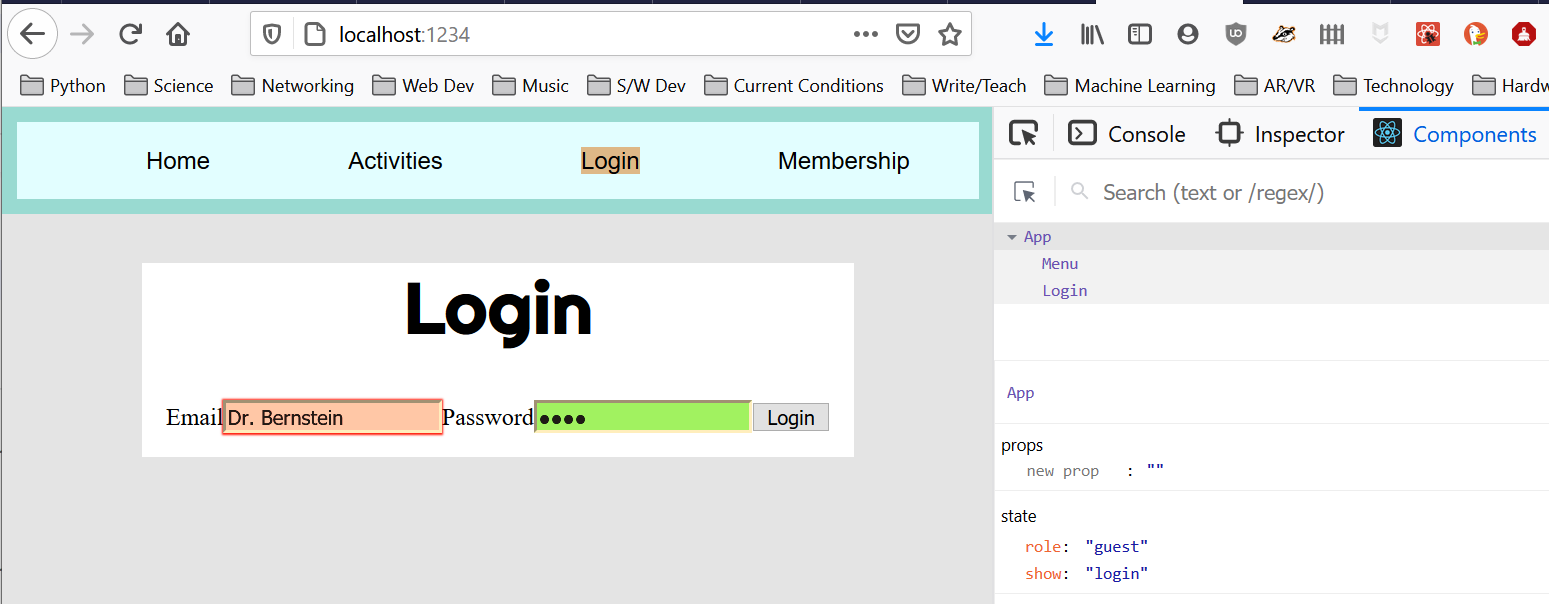
Don’t worry if you don’t have a “login” component.
Question 4. (20 pts) Activity Management
We are going to create a component to allow administrators or members to add club activities. Note that the activities/events should be held in a state variable in your App component.
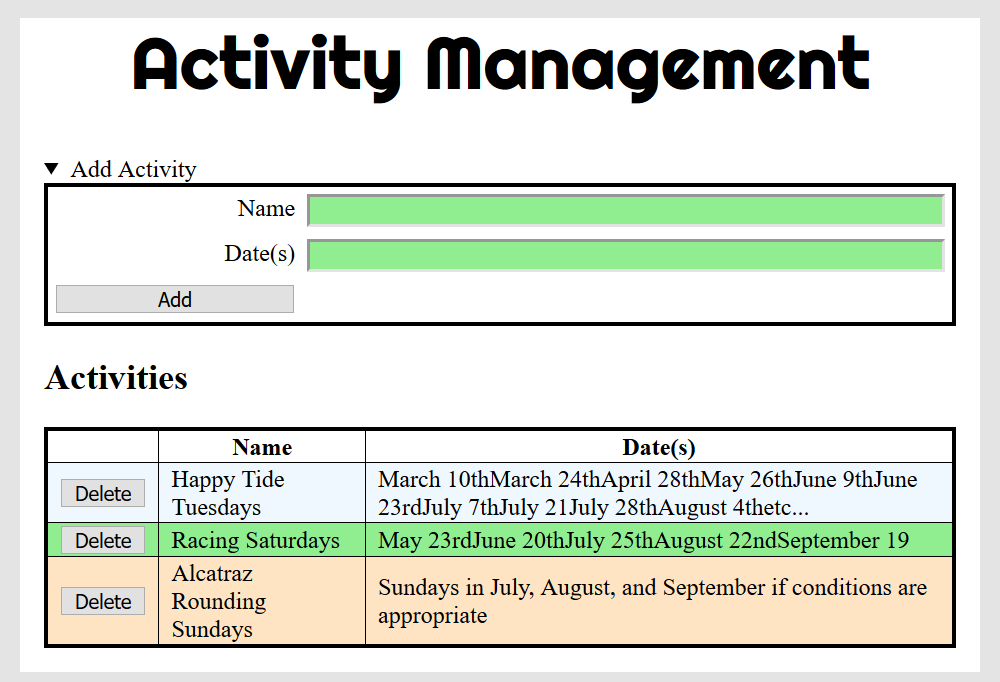
(a) Club Activity Management Mockup
Create a new component for club activity management. Call it AdminActivity.js. “Mock up” the user interface to include functionality for adding and deleting club activities, but don’t provide any functionality yet. Take a screen shot. My screen shot looks like the following:
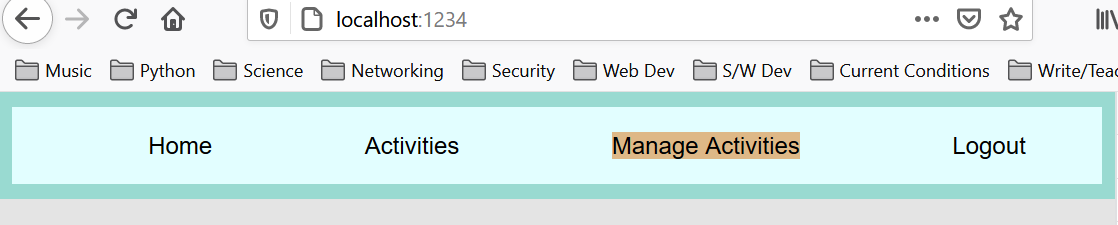
(b) Menu Item for “Manage Activities”
Create an additional menu item in the menu for members/admins. Mine looks like:
(c) Add Activity Functionality
For the UI mockup it didn’t matter if the React component was function or class based. Now we want to keep the activity information as state and manipulate it. What kind of component should we use? Add the capability to this component to add an club activity. Remember that the list of activities/events shoud be pass as a prop and that you will need to “call up” to change the list of activities in the App component. Take a screen shot after you have added a couple activities and show the react component view. I get something like:

(d) AdminActivity Component Constructor
Show the code for your component constructor function here.
(f) Show Event handling functions
Show the event handling functions you needed to write.